Setup Guide
Connect Lokihub to your node and start managing your Lightning liquidity in minutes.
Before You Start
To use Lokihub, you'll need:
- Lokihub App: Download it here.
- A running FLND node — choose one of the following:
- Lokinode (Recommended): The desktop GUI client for running your Lightning node. Download Lokinode →
- tWallet v1 (TUI users): The terminal wallet also works as a node backend. See the tWallet guide →
If you're running Lokinode on the same computer, Lokihub will find it automatically. Use the Automated Connection option!
First Launch
- Open Lokihub.
- Follow the setup wizard to get started.
Alternative: Plug-and-Play Server Setup
Want to run a 24/7 node on a VPS or dedicated server? This server-ready bundle uses Docker to automate the installation of both flnd and Lokihub, with a simple script for wallet initialization — no manual configuration needed.
Step-by-Step Setup
1. Create a Password
Set a strong password to protect your data. This password encrypts your connection details and app settings.
Important: We cannot recover this password for you. Please write it down and keep it safe.
2. Choose Your Services
Lokihub uses specific services to interact with the network:
- Nostr Relay: Connects your node to external apps.
- Block Explorer: Shows you transaction details.
- Optional: You can also add Liquidity (LSP) or Swap services later.
3. Connect to Your FLND Node
Lokihub connects to the Lightning node running on your machine (Lokinode or tWallet v1).
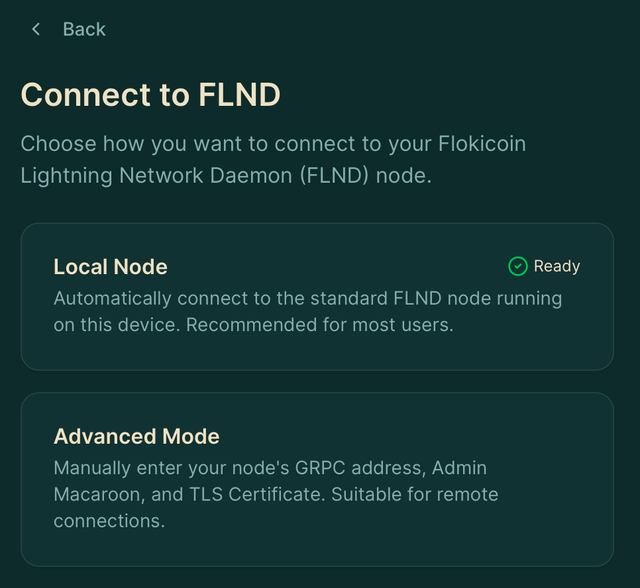
Option A: Automated Connection (Recommended)
If Lokinode (or tWallet v1) is running on the same machine:
- Choose "Local Node" during the setup wizard.
- Lokihub will automatically detect your running node and link up.
- You're ready to go!
Option B: Custom Node Connection (Advanced)
If your node is running on a remote machine (VPS, Raspberry Pi, etc.) or you want to connect manually:
-
Select "Advanced Mode"
-
Enter the connection details:
- gRPC Address: IP and port (example:
127.0.0.1:10005) - Macaroon: Paste the
admin.macaroonhex content - TLS Certificate: Paste the
tls.certhex content (Optional)
- gRPC Address: IP and port (example:
-
Click "Connect"
- tWallet: Press CTRL + N to open the Lightning configuration window. It shows your gRPC Address, Macaroon Hex, and TLS Certificate Hex — copy and paste them into Lokihub.
- Lokinode: Open the node settings panel inside the app to find the same connection details.
Troubleshooting
Can't connect to a local node?
- Make sure Lokinode (or tWallet) is running and fully synced
- Check that the relevant ports aren't blocked by your firewall
Remote connection fails?
- Verify the gRPC address is correct
- Ensure your node is reachable from the network
- Double-check that your macaroon and TLS cert hex strings are correct
Need help?
Join the community on Discord in #lokihub
Next Steps
1. Secure Your Node (Required)
Before you open your first channel, you need a solid recovery plan. Unlike on-chain funds, Lightning liquidity requires active protection.
Your 24-word seed phrase only recovers funds on the blockchain. To protect your channel liquidity from system failures, you must keep a copy of your channel.backup file.
- Locate: On Linux, the file is typically at
~/.flnd/data/chain/flokicoin/mainnet/channel.backup. - Backup: Copy it to a separate device (USB, cloud storage, etc.) every time you open or close a channel.
- Learn More: Read the full Lightning Backup Guide.
2. Further Reading
Once connected, you can: